Anyway anyway, does your PC, like my friend’s, forces an update every time you try to shut down your computer or when you turn it on? Does the Windows updates weigh down on your PC’s resources and your productivity? Do you dread seeing the Windows update notification on your PC’s display when you didn’t initiate the process? Here’s how you can permanently stop automatic updates on Windows 10 PC.
1. Meter your Internet Connection
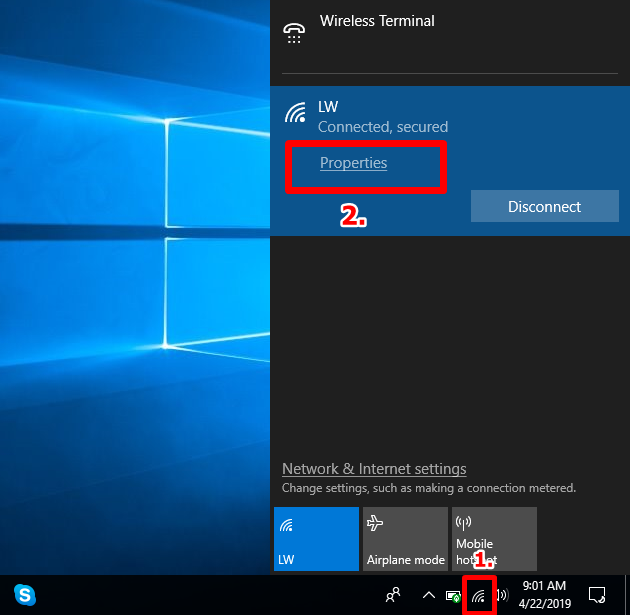
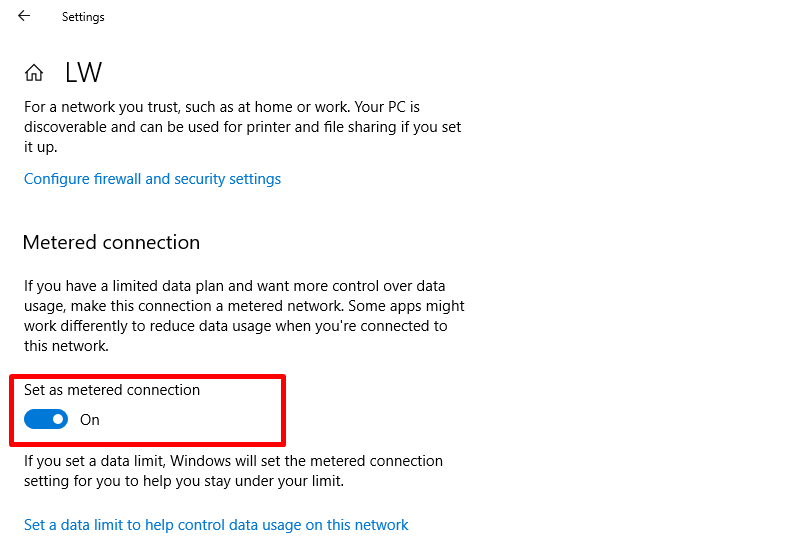
One of the many reasons why your Windows 10 PC automatically downloads and install updates is because you are constantly connected to the internet. However, you can’t stay off the internet ’cause of some annoying updates, right? What you can do instead is to “Meter” your network connection. “Metering a connection” basically tells your PC not to download and install any updates over the network you are connected to. To meter the network you are connected to; A) Click the WiFi icon at the bottom-right corner of your PC’s taskbar. B) Click “Properties” right below the wireless network you are connected to. C) On the network property page, toggle the “Set as metered connection” option to “On” NOTE: On Windows, you can only meter WiFi networks. If you are connected to the internet via an Ethernet or Dial-up connection, you can try other methods below.
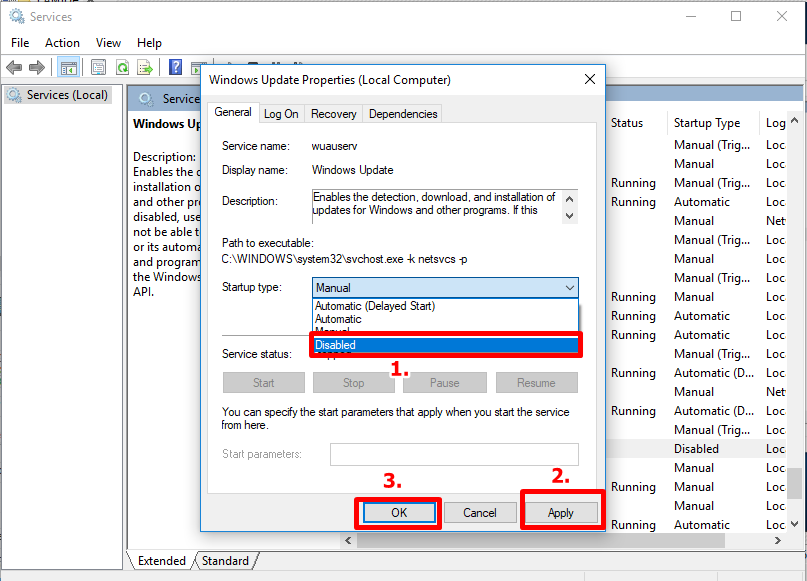
2. Disable Windows Update Service
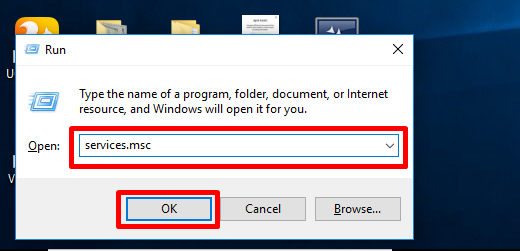
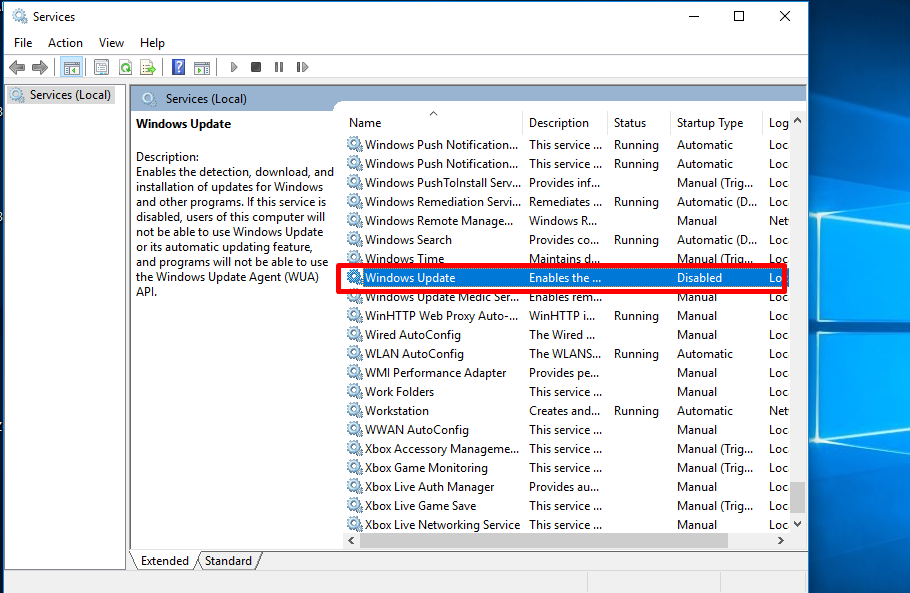
Another way to halt automatic updates on your PC is to disable the Windows Update Service using the Run command. Here’s how to get it done. A) Launch your PC’s RUN command by pressing the Windows logo + R keyboard shortcut on your PC. B) Type in services.msc into the box and click “OK” or tap Enter on your keyboard. C) On the Services page, scroll down to “Windows Update” and double-click. D) Change the Startup type option to “Disabled“ E) Click “Apply” and “OK” to save.
3. Disable Local Group Policy
By disabling Group Policy using the Local Group Editor, you can also permanently stop your Windows PC from automatically updating. We talked extensively about how you can use the Local Group Editor to stop Windows HERE. You can check out the summary below.
Launch the RUN command by holding the Windows Key + RNavigate to Computer Configuration » Administrative Templates » Windows Components » Windows Update.On the Windows Update page, double-click “Configure Automatic Updates”On the left side of the page, Select “Disabled“.Click “Apply” and “OK” to save the settings.
Using any (or all) of the three methods above, you can put an end to automatic download and installation of updates on your Windows 10 PC.