Read: AirPods Pro Review: Worth $249 or Overpriced?
1. Noise Cancellation with One AirPod
The AirPods Pro supports Active Noise Cancellation. By default, however, activating Noise Cancellation mode requires the user to have both AirPods placed in the ear. That’s how it is designed. Good thing is that you can reconfigure the AirPods Pro to use Noise Cancellation when just one AirPod is in use (the ear). This will come in handy for individuals with Single-Sided Deafness (SSD). You could also try this out just for experimental purposes. Follow the steps below to enable ‘Noise Cancellation with One AirPods’ on the AirPods Pro.
Go to the iPhone/iPad Settings menu and select Accessibility.Next, select AirPods.Scroll to the bottom of the AirPods settings menu and toggle on the ‘Noise Cancellation with One AirPod’ option.
2. Tap to Check Wireless Charging Status
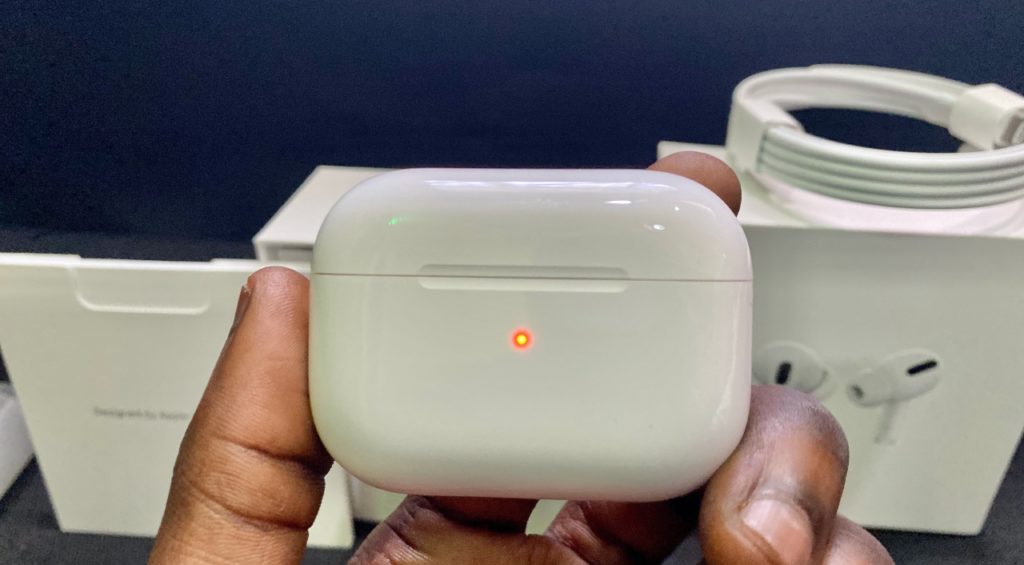
The AirPods Pro can be charged via a lightning cable and wireless charging. With a lightning cable plugged in, you can easily tap the setup button at the back of the charging case to check if the AirPods are charging (orange status light = charging. Green status light = AirPods are fully charged). Things are a little different when wirelessly-charging the AirPods Pro. When placed on a wireless charging mat, a quick way to check the AirPods Pro charging status is to tap anywhere on the charging case with your finger. The status will light come on, indicating the charging status.
3. Modify Press Speed
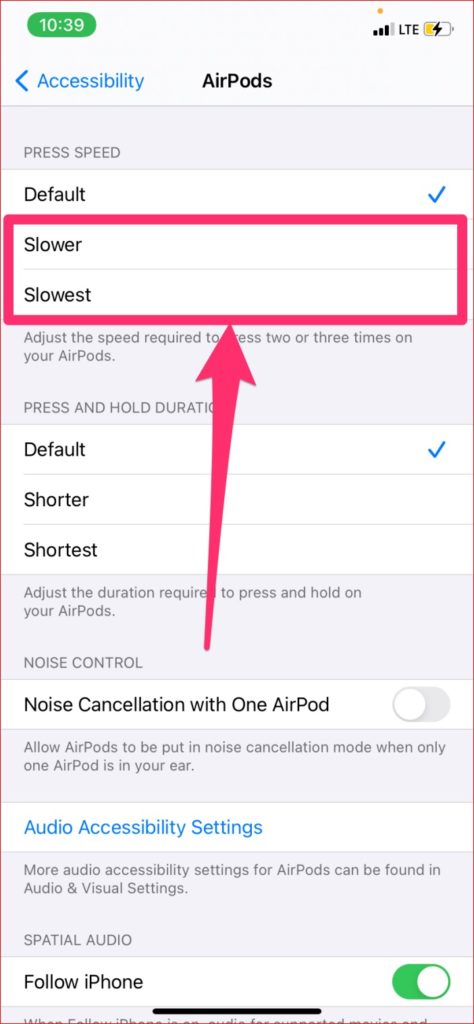
The AirPods Pro’s Force Sensor supports multiple audio playback and call controls. For certain actions like fast-forward and skip backward, you’d have to press the Force Sensor multiple times consecutively in quick succession. If the press-speed is to fast, you can adjust it to a little slower. The default setting works just fine —at least for me— and I’ve never had to adjust the press speed. However, this is a nice option to have. Here’s how to adjust the Force Sensor press-speed on the AirPods Pro.
Go to the iPhone/iPad Settings menu and select Accessibility.Next, select AirPods.Scroll to the Press Speed section and select either Slower or Slowest —whichever works best for you.
4. Adjust Press-and-Hold Duration
To switch between Noise Cancellation and Transparency modes on the AirPods Pro, you’d need to tap and hold the Force Sensor for about a second. You can also adjust the Press-and-Hold duration to be shorter if you want to switch the modes faster. Here’s how.
Go to the iPhone/iPad Settings menu and select Accessibility.Next, select AirPods.Scroll to the ‘Press and Hold Duration’ section and select either Shorter or Shortest —whichever works best for you.
5. Assign Siri Button
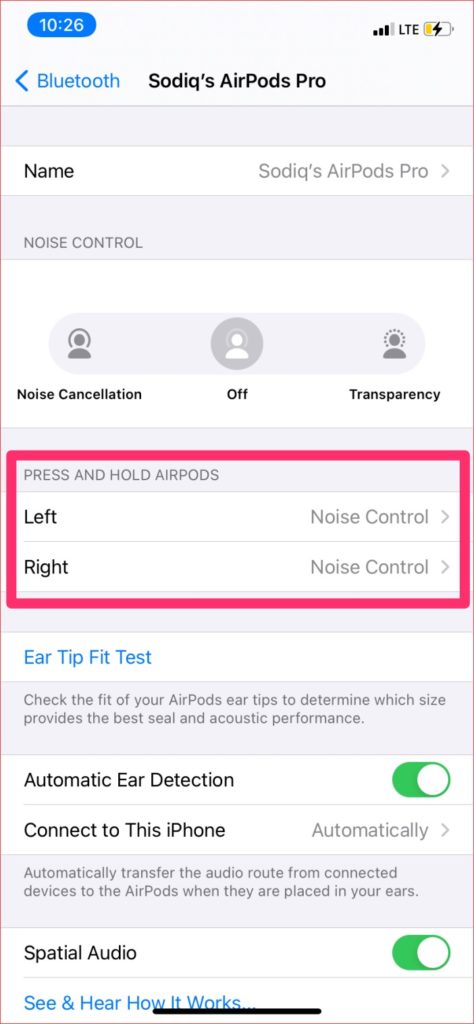
You can use Apple’s native virtual assistant, Siri, with the AirPods 2 (2nd Gen) and AirPods Pro. However, in lieu of muttering the ‘Hey Siri’ hotword, the AirPods Pro lets you prompt Siri using either of Force Sensors. That way, you can use the stem/Force sensor of one AirPod for Siri and the other for switching between Noise Cancellation and Transparency Mode. Step 1: Go to the Bluetooth Settings menu and tap the info icon next to your AirPods Pro. Step 2: In the ‘Press and Hold AirPods’ section, select the AirPod (Left or Right) you want to use for Siri. Step 3: Finally, select Siri.
6. Remotely Locate AirPods
Did your AirPods Pro get stolen? Or you just can’t seem to remember where exactly you kept it in your room? You can easily locate them using the ‘Find My’ app. Here’s how.
On iPhone
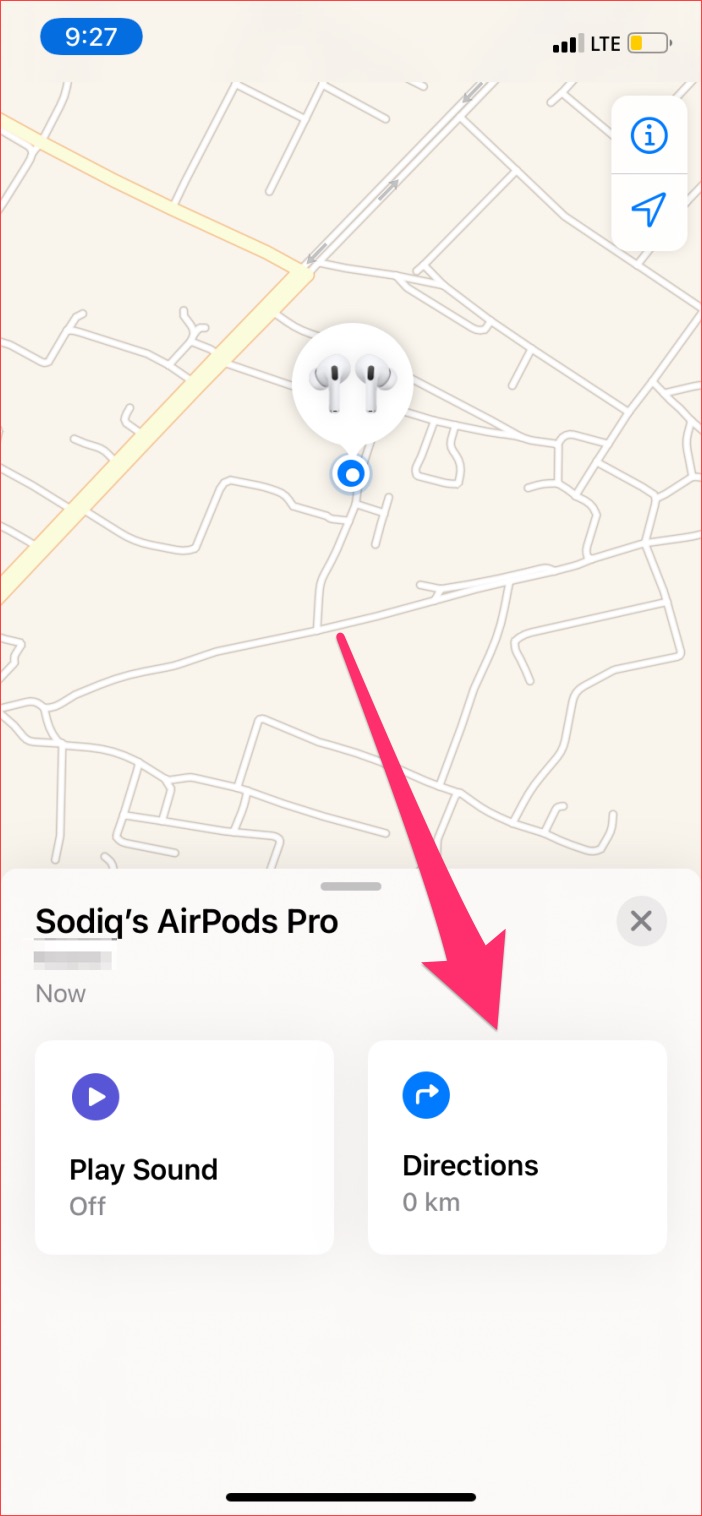
Step 1: Launch the Find My app on your iPhone and tap the AirPods Pro from the list of devices. Step 2: If you think the AirPods are in close proximity, tap the Play Sound button. The AirPods will begin to play a sound when connected. By connected, this means that at least one of the AirPods (left [L] or right [R]) must be out of the charging case. If the AirPods are in the charging case, they won’t play a sound. When you touch the AirPods or the app detects that you’ve found them, you’d get a ‘Your AirPods have been found nearby’ message in the Notification Center. Step 3: Tap the Directions button to pinpoint the exact location of the device. This is perfect for location stolen AirPods.
On Macbook
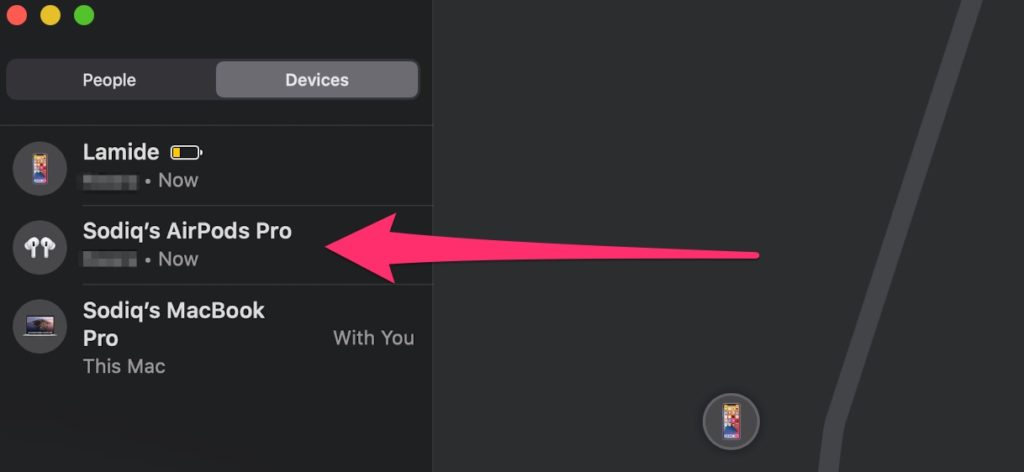
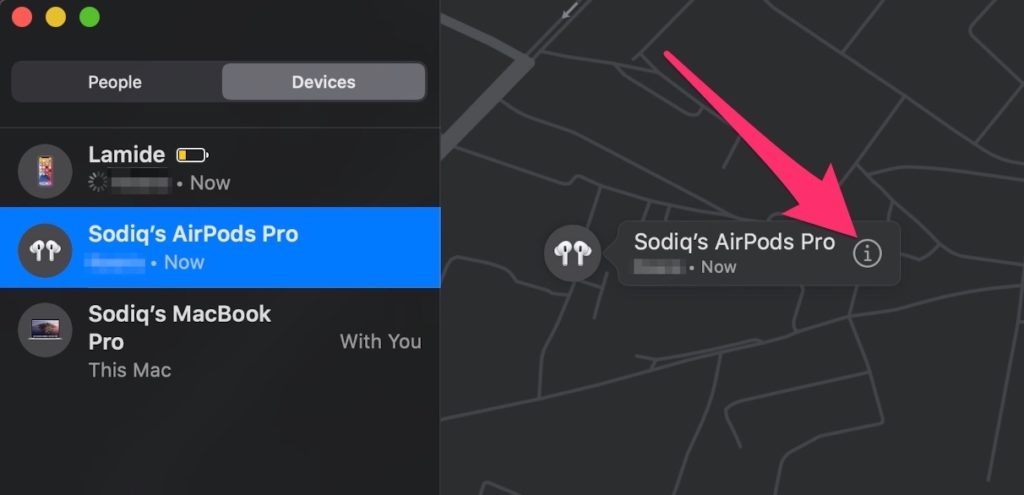
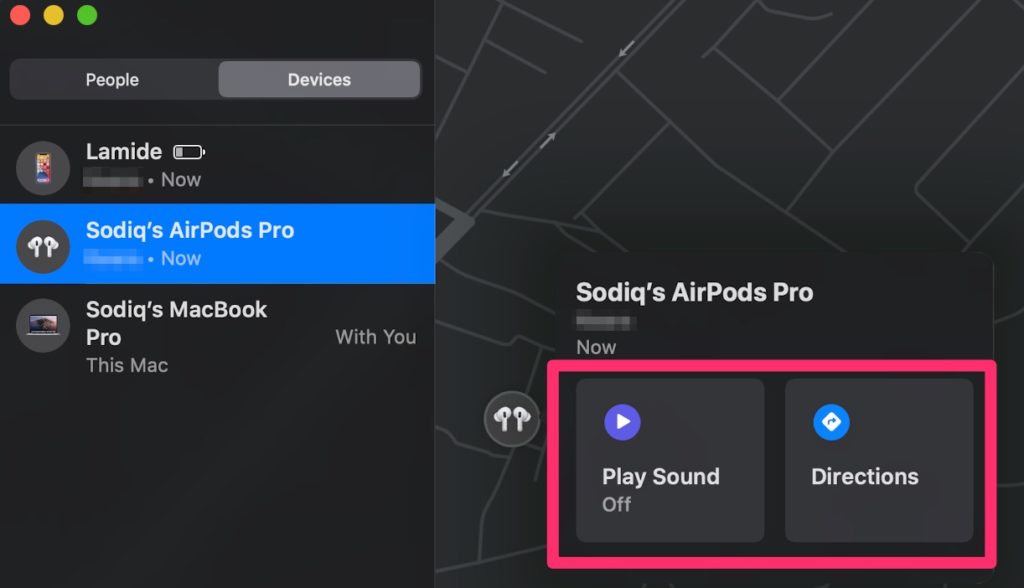
The Find My app on the Macbook works just similarly. Here’s how to use it to remotely locate your AirPods. Step 1: Launch the Find My app, navigate to the Devices section, and tap the AirPods Pro. Step 2: Tap the info icon next to the AirPods on the map. Step 3: Tap the Play Sound button to play audio on the missing AirPods or tap Directions to get location information. And there you have it. Proceed to use these AirPods Pro tricks and tips to secure, customize, and optimize the listening and overall usage experience. Is there any trick(s) we omitted? Do let us know in the comments.
